|
WinArchiver Pro can make Windows bootable USB drive from ISO file, you can then use the USB drive to
boot the computer, and setup Windows from USB drive. This function is only
available in WinArchiver Pro full version. WinArchiver Pro can create
bootable USB drive for Windows 11, Windows 10, Windows 8, Windows 7, Windows
Server 2022, 2019, 2016, 2012, and Windows Vista.
You need order WinArchiver Pro
full version to use the feature. Please follow the steps to create bootable
USB drive for Windows.
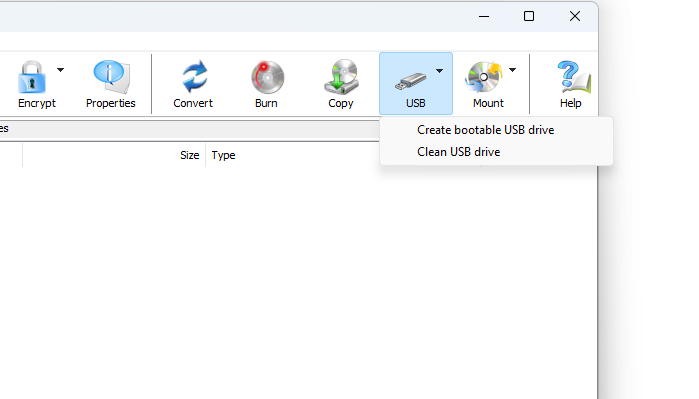
1. Start WinArchiver Pro.
2. Choose the menu item, "Tools --> Create bootable USB drive...". The "boot
usb drive maker" dialog will display.
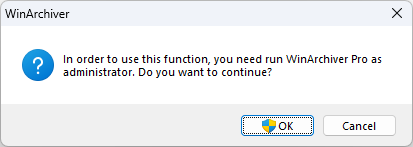
The system privilege is required
to create bootable USB drive. You may also need confirm UAC
dialog to continue.
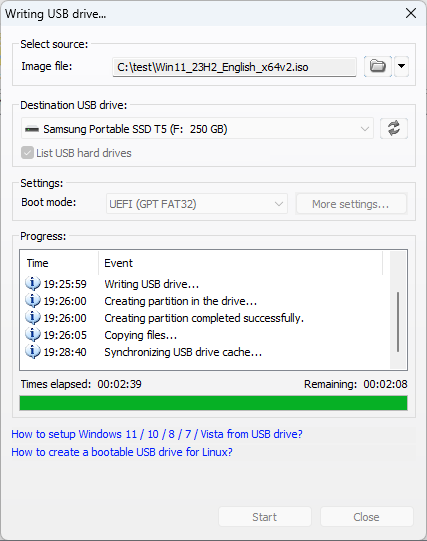
3. Click "Browse" button to select the Windows SO file as source
image file. You can download the ISO file from Microsoft website if you don't have
it.
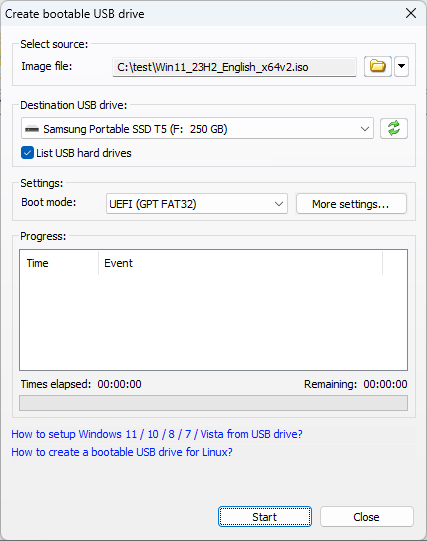
4. Select the USB drive from the
drive list. All data in the USB drive will be deleted when making the USB
drive bootable. Please make sure that you have selected the correct USB
drive, and backed up all important files on the drive.
5. Choose the appropriate boot
method. "UEFI" mode is suggested for most of modern computers, you
can change it to "BIOS" or "BIOS and UEFI CSM" if your
computer doesn't support UEFI booting. Please enable the CSM support in BIOS
configurations if "BIOS" or "BIOS and UEFI CSM" mode is
selected. You can view or change other settings by clicking "More
settings" button. If you are not sure, please just keep the settings unchanged.
6. Click "Start" button
to start creating bootable USB drive.
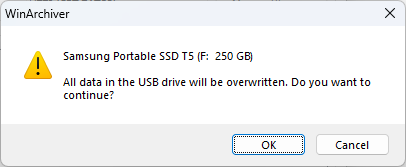
7. WinArchiver Pro will display a
warning dialog which prompts you that all data in the USB drive will be
erased. Please confirm again that you have selected the correct USB drive
and click "OK" to continue.
8. WinArchiver Pro will start
creating bootable USB drive for Windows setup. Depending on the ISO file size and
the USB drive speed, it may take several minutes to finish the process.
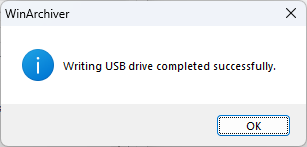
9. WinArchiver Pro will show a
message box "Writing USB drive completed successfully." if there
is no error occurred during the above process.
10. You have now created bootable
USB drive for Windows. You need reboot your computer and configure
BIOS settings to boot from USB drive. Windows setup file should load after
you save the BIOS settings and restart your computer. If it doesn't work,
please make sure that you have correctly configured BIOS bootable option.
You may also try another boot method when creating the bootable USB
drive.
|